From panel to data

With weather compensation, the water temperature follows the outdoor temperature. Get the curve right and the system works little and well. Get it wrong and comfort suffers while consumption creeps up unnoticed.
Weather compensation is the simplest way to make a heating system use less energy. The idea is intuitive: when it is less cold outside, the building needs less heat, so the water can be cooler. A sensor on the outside wall measures the outdoor temperature, and the controller works out the right flow temperature along a heating curve.
Almost every modern boiler and every heat pump supports it. Yet in many systems the curve is still the factory default, or has been raised “because the bedroom was cold”. Here is how to set it properly.
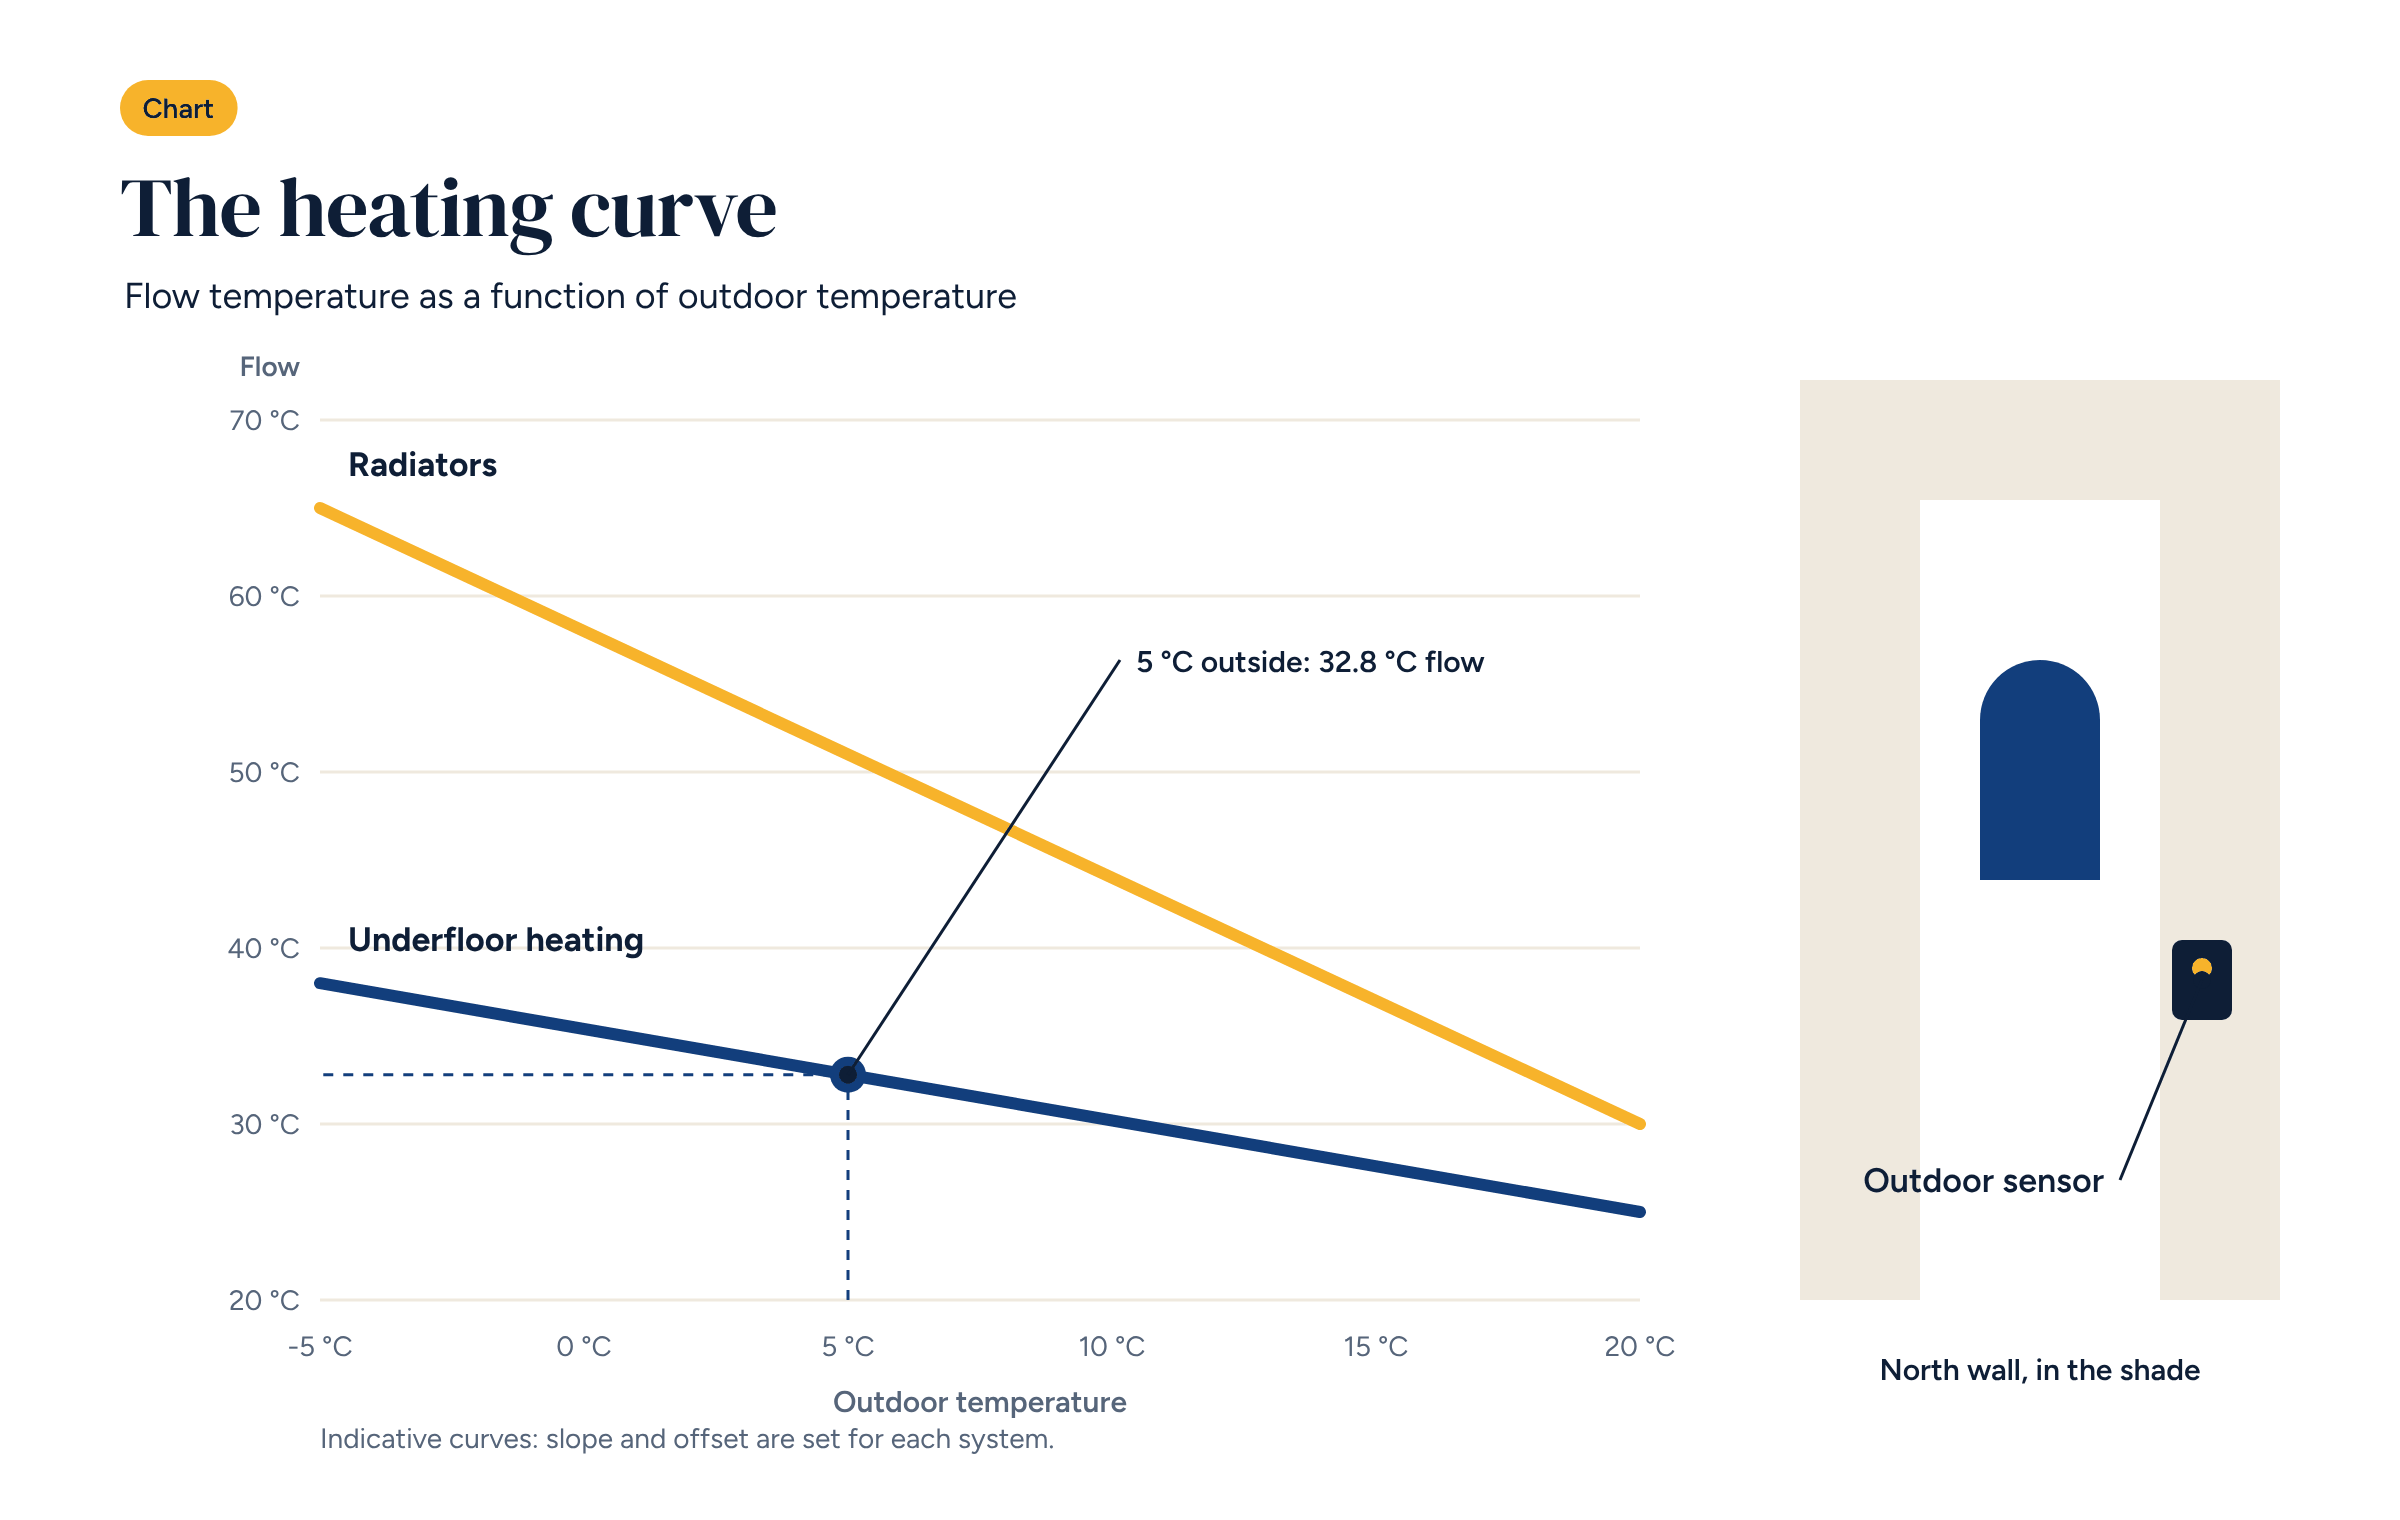
The heating curve links two temperatures: outdoors, on the horizontal axis, and the flow water, on the vertical axis. In its simplest form it is a falling straight line: the warmer it gets outside, the lower the flow temperature.
It is defined by two points.
The outdoor design temperature is set by national standards for each location: in Italy, for example, it is 0 °C in Bari and −5 °C in Milan. In the UK and elsewhere, the heat loss calculation for the building states it. The design flow temperature comes from the system design, which the designer should have left behind.
Controllers hardly ever ask for the two points. They ask for two parameters, which go by different names from one brand to the next but are always the same.
The slope says how many degrees the flow temperature rises for every degree drop outside. Underfloor heating has low slopes, usually 0.3–0.6. Radiator systems have higher ones, 1–1.8. In the curve shown in the illustration, the underfloor system has a slope of about 0.5: from 20 °C to −5 °C outside, the flow temperature goes from 25 to 38 °C.
The offset, or parallel shift, raises or lowers the whole curve without changing its slope. It corrects room temperature evenly, at every outdoor temperature.
The rule of thumb for adjusting it after start-up is simple:
Make each change in small steps and judge it after at least a day, two with underfloor heating. The screed is slow: a curve changed in the morning shows its effect in the evening.
The outdoor sensor in the sun. This is the most frequent mistake. A sensor fitted on a south or west wall, in direct sun, reads 15 or 20 °C in mid-winter and the system stops heating just when it is needed. The sensor belongs on the north wall, or at least in the shade, away from windows, flues and vents, about two metres above ground.
A curve set too high “to be safe”. Raising the curve hides the problem of one cold room by heating all the others more. With actuators closed on zones that are already warm the effect is hard to see, but the system runs hotter than it needs to. With a heat pump the cost is direct: every extra degree of flow temperature lowers efficiency.
No safety limits. The curve needs a maximum flow limit, consistent with the floor, and a minimum one. The underfloor heating standard, EN 1264, sets the maximum floor surface temperature: 29 °C in occupied areas. The hard-wired high-limit thermostat is still required.
One curve for the bathroom radiators too. If the same heat source feeds an underfloor circuit and radiators, you need two circuits with two curves, which means at least a mixing valve on the underfloor side.
With a heat pump, the heating curve is not a detail: it is the main driver of efficiency. A heat pump’s performance, its COP, falls as the gap grows between the outdoor air temperature and the water temperature it has to produce. Every degree taken off the flow temperature, for the same comfort, means less electricity used.
That is why a heat pump calls for the lowest possible curve, even if the system runs for longer. Underfloor heating, with its large surface area, is the ideal emitter: it heats well even with water at 30 °C. And it makes sense for the system controller to decide the flow temperature and write it to the heat pump over Modbus, so the curve also takes account of what is happening in the rooms.
On its own, the heating curve knows nothing about what happens indoors. It cannot see the sun through the windows, the people in a meeting room or the oven on in the kitchen. That is why the best systems add a correction from the room sensors.
The principle is simple: if most zones are already up to temperature, the flow can drop; if many zones have been calling for heat for hours, it can rise a little. It is a small correction, one or two degrees, but it keeps the curve close to the minimum needed at all times. When every room sensor is connected to the same controller that runs the flow temperature, as in Brick’s configurations, it is easy to set up.
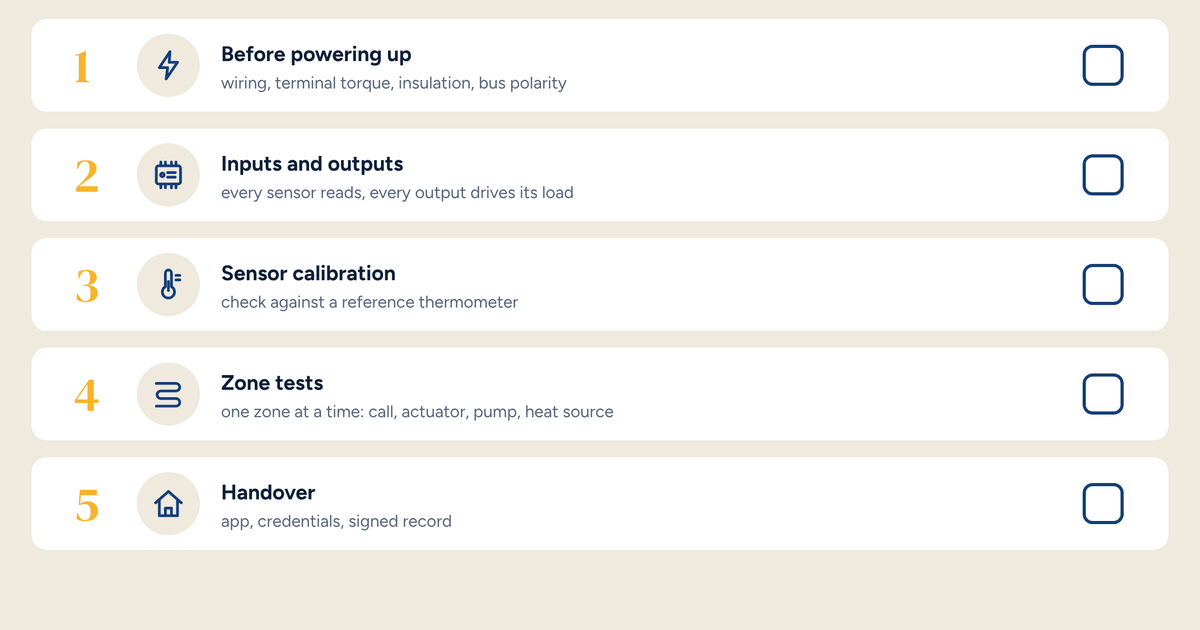
For a new or freshly upgraded system, follow this sequence.
Step five is the one almost nobody does. Yet that is where a textbook curve becomes the right curve for that building, with its orientation and the people who live in it. We covered this in our guide to underfloor heating control too: weather compensation is the first layer, zones are the second.
The spreadsheet derives slope and offset from your system’s design data and shows the flow temperature table, degree by degree.